Phone Interface Tour
From top to bottom, the phone workspace contains the waveform, tool panels, progress bar, and bottom toolbar. For tablet and browser arrangements, see Using a Tablet and Using a Browser.
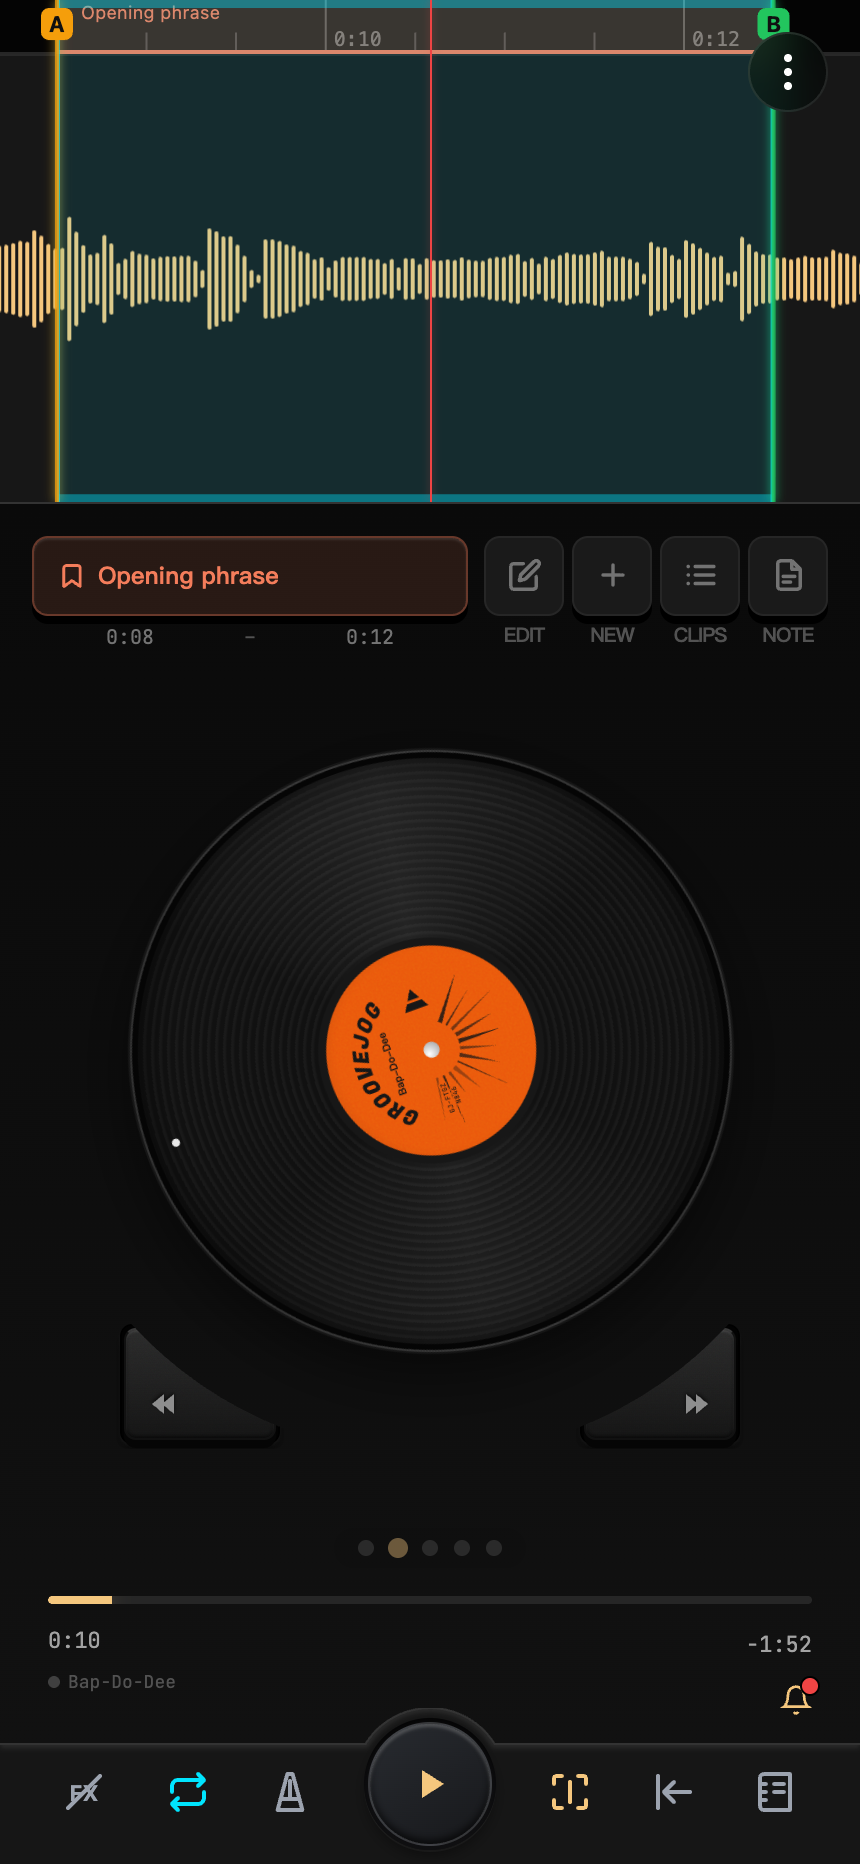
Ruler and Waveform
The ruler above the waveform lets you select a loop range. The waveform shows the playhead, highlighted loop, saved clips, and detected beat lines. Pinch with two fingers to zoom the timeline.
With Follow Playhead / Centre Playhead enabled in the bottom bar, the playhead stays in the middle, and dragging the waveform with one finger scrubs forward or backward. With it disabled, dragging pans the view. See Waveform and Ruler.
Video projects show the picture above the waveform. Pinch with two fingers to zoom in on details.
Five Tool Panels
Swipe left or right, or tap the dots below to switch. From left to right:
| Panel | Purpose |
|---|---|
| Pads | Assign clips to pads, then hold a pad to preview or loop it |
| Vinyl (default) | Drag to scrub; tap the center to play/pause, hold the center to adjust speed; set A/B and clips |
| Speed and Pitch | Adjust the channel, pitch, and playback speed |
| EQ | Adjust seven frequency bands |
| Stems | Start instrument separation or adjust the mix of existing stems |
The locks on the disc and pads prevent accidental panel switching by swiping. After leaving the disc page, you can still drag the small half-disc above the bottom bar to scrub. See Using Panels.
Progress Bar and Project Info
Use the progress bar to jump through the whole track. Dragging previews a position; the playback position changes only when you release.
Tap the project name at the lower left to open Project Info. You can edit the name, description, notes, and theme color, or save the project. An amber indicator and asterisk appear after changes; saving restores the gray dot.
Bottom Toolbar
Play/Pause is in the center. The surrounding controls are Effects Bypass, Loop, Beats, Follow Playhead / Centre Playhead, Return to Start, and Notes.
Tap Loop to turn looping on or off; hold it to open auto-speed and interval settings. See Bottom Toolbar for the other buttons.
Menu and Inbox
The upper-right menu provides importing, opening and saving projects, exporting, playlists, and settings.
The bell opens the Inbox, with announcements, Quick Start, and feature discovery. Select an entry's “Start” button to follow its guided steps. Completed entries are marked; you can leave at any time or repeat them. If a prerequisite is missing, the entry explains what you need to import, which clip to save, or which setting to enable first.
A red dot indicates unread announcements or an unfinished Quick Start; amber indicates more features to explore. Browse what you need—you do not have to complete every entry. Settings lets you hide the bell or reset onboarding.